
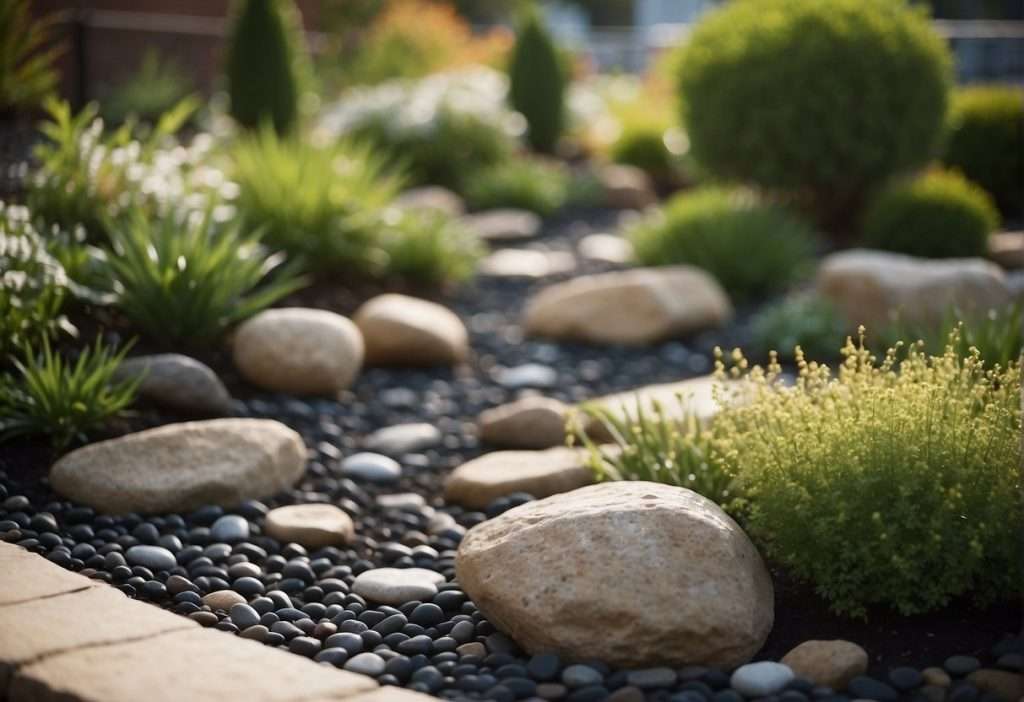
Landscaping rocks can significantly enhance the aesthetic appeal of your outdoor space. They come in various sizes, colors, and types, each suited for different landscaping needs. Whether you’re looking to create a rock garden, a pathway, or simply accentuate your yard with natural elements, selecting the right rocks and placing them effectively is crucial.

To begin using landscaping rocks, consider the function they will serve in your garden. Are they to provide a durable ground cover, build a retaining wall, or add decorative elements around plant beds? Your objectives will dictate the size and type of rocks you choose. Small pebbles or river rocks are ideal for paths or as mulch, while larger boulders can serve as focal points or natural seating.
When incorporating rocks into your landscape design, it’s important to prepare the site by clearing weeds and laying down a landscape fabric to prevent growth beneath the rocks. Proper placement is key to achieving a balanced look, so plan your layout before setting the rocks in place. By giving thought to the practical and aesthetic aspects of your design, you can use landscaping rocks to create a cohesive and inviting outdoor environment.
Choosing the Right Types of Landscaping Rocks
Selecting the right landscaping rocks is essential for achieving the aesthetic and functional goals of your garden. Pay attention to texture, color, size, shape, and durability when making your choice.
Considering Texture and Color
When you’re evaluating texture, consider how the feel of the rock can complement your garden. A smooth texture such as that found in river rock may suit a serene garden space, while rough boulders can add a more natural and rugged look.
For color, you have numerous options:
- Red tones can be achieved with certain granites or lava rocks.
- Black and grey tones might come from slate or river rocks.
- Warmer earth tones are typical of limestone or sedimentary rocks.
Understanding Sizes and Shapes
Sizes range from small pea gravel to large boulders and affect both the look and function of your landscaping.
Shapes also vary widely and can be chosen to suit the landscape’s style:
- Round stones like pea gravel for pathways.
- Angular rocks like quartz or broken granite for a more modern appearance.
Use this table to match common rock types with their typical sizes:
| Rock Type | Typical Size |
|---|---|
| Pea Gravel | < 1/4 inch |
| River Rock | 1–5 inches |
| Boulder | > 10 inches |
Selecting Material for Durability
The material of your landscaping rocks determines their longevity and maintenance needs. Choose based on your climate and intended use.
- Granite is hard and durable, a good choice for high-traffic areas.
- Limestone is slightly more delicate and best for low-traffic garden accents.
Consider how the climate may affect your rocks, with materials like slate possibly splitting in freeze-thaw cycles, while others like quartz are more resistant.
Designing with Landscaping Rocks
Landscaping rocks can transform your outdoor space by introducing texture, structure, and natural beauty. This section will guide you on integrating these elements effectively into your landscape design.
Creating a Rock Garden
To establish a rock garden, choose a variety of rocks and position them among drought-resistant plants. Using flagstone and fieldstone, create layers and height for visual interest. Incorporate river rocks for a natural effect, ensuring they’re strategically placed to mimic a natural landscape.
Incorporating Rocks into Pathways
For a durable and aesthetically pleasing path, lay flagstone or cobblestone in a bed of compacted sand or gravel. Implement a stepping stone pathway with evenly spaced fieldstone for a more organic look. The stones should be stable underfoot and spaced according to your stride.
Accenting with Boulders
Make a statement by placing boulders as focal points in your garden. When positioning boulders, bury a portion underground for stability and a natural appearance. Balance their size and shape with surrounding plantings; large boulders complement tall grasses and shrubs, while smaller ones work with delicate groundcovers.
Building Retaining Walls and Edging
Construct retaining walls using stacked stone to manage slopes and create planting areas. To achieve a professional look, ensure each stone is level and fits tightly against its neighbor. Use smaller rocks like river rocks for edging to define garden beds and pathways, laying them in a shallow trench to keep them in place.
Functional Uses of Landscaping Rocks
Landscaping rocks are versatile materials that can enhance the functionality of your outdoor space. From facilitating proper water management to supporting lush plant growth, rocks are essential in creating a balanced and efficient garden ecosystem.
Improving Drainage Solutions
To prevent waterlogging and protect your garden’s health, incorporate rocks into your drainage plan. Drainage is crucial, as stagnant water can harm plant roots and erode soil nutrients.
- French Drains: Use small stones or gravel to fill a French drain system, which redirects water away from structures and garden beds.
- River Rock Beds: Create drainage paths with river rocks to channel excess water during heavy rains.
| Drainage Type | Rock Size | Benefits |
|---|---|---|
| French Drains | Small | Redirects water, prevents saturation |
| Dry Creek Beds | Varied | Manages runoff, adds aesthetic value |
Creating Water Features
Water features, such as ponds or fountains, are dynamic additions that can be edged or filled with rocks to create natural-looking water bodies.
- Ponds: Outline your pond with larger boulders for a boundary and use smaller pebbles for the bottom to mimic natural waterways.
- Fountains: Place smooth stones around fountains to enhance the sound of the water and to prevent soil erosion.
| Water Feature Type | Rock Usage |
|---|---|
| Ponds | Boulders for edges, pebbles for bed |
| Fountains | Stones for aesthetics and sound amplification |
Supporting Plant Life
Rocks provide support for a variety of plants, from small succulents to large trees. They can be used in rock gardens or as a part of the soil mix for better aeration and drainage.
- Rock Gardens: Create a rock garden by grouping large rocks with plantings of drought-tolerant plants like succulents and shrubs.
- Mulching: Use pea gravel or river rock as mulch to retain soil moisture and reduce weed growth around plants and trees.
| Plant Type | Rock Use | Benefit |
|---|---|---|
| Succulents | Rock Gardens | Aesthetics, Drainage |
| Shrubs/Trees | Mulch | Moisture retention, Weed control |
Maintenance and Care for Landscaping Rocks
Proper maintenance ensures your landscaping rocks remain an appealing and durable part of your garden. A low-maintenance approach can keep your rock features looking pristine while being both time and cost-effective.
Preventing Weed Growth
To prevent weed growth amidst your landscaping rocks, follow these steps:
- Lay a Weed Barrier: Before installing your rocks, place a landscape fabric or plastic sheeting over the soil. This will inhibit weeds from sprouting through the rocks.
- Use Pre-Emergent Herbicides: Apply a pre-emergent herbicide seasonally to deter weed germination. Always follow the product instructions for safe and effective use.
- Install Edging: Create a physical barrier with edging materials around your rock area to prevent grass and weeds from encroaching.
Cleaning and Preservation
Maintaining the cleanliness and quality of your landscaping rocks involves a few routine tasks:
- Regular Inspection: Examine your rocks periodically for accumulated dirt or debris. Remove leaves and organic materials to prevent decomposition and weed growth. Task Frequency Method Rinse Rocks Quarterly Use a garden hose to wash away loose dirt. Deep Clean Biannually Scrub with a brush and a mix of water and mild detergent. Rinse thoroughly. Check pH Levels Annually Test soil pH to ensure it remains conducive to rock durability. Adjust as necessary with appropriate materials.
- Address Displacement: Realign any rocks that have shifted due to weather or foot traffic to maintain the integrity of your design.
- Combat Algae and Mildew: In damp conditions, treat rocks with a mixture of 1 part bleach to 10 parts water to remove algae or mildew stains. Always wear protective gear and rinse the area well after treatment.
Landscape Rock Installation Techniques
Landscape rock installation can enhance your outdoor space whether you opt for the DIY route or professional installation. The key to success lies in preparing the foundation and choosing the right materials for long-lasting results.
DIY Installation Tips
Before starting your DIY project, gather the necessary tools and materials such as a shovel, wheelbarrow, landscaping fabric, and rocks of your choice. Begin by marking the area where your rocks will go and remove any debris or old landscaping features. Proper foundation is critical; you should lay down a layer of landscaping fabric to inhibit weed growth.
For pathways or areas bearing weight, a base layer of crushed stone provides stability, preventing your rocks from sinking over time. Compact the base layer and ensure it’s level before placing your rocks.
When laying the rocks, use a mixture of sizes for a more natural look. If you’re using heavier stones, enlist the help of a partner to move and place them.
Professional Installation Advice
Professional installation ensures that the job is executed correctly with high-quality materials like commercial-grade landscaping fabric, mortar, and concrete, if needed. A professional can also help you choose the best rock type suited to your climate and soil.
Professionals often use machinery for larger projects, which can be more efficient and less disruptive to the surrounding landscape. For installations requiring precision and structure, such as retaining walls, hiring a professional is advisable as they will use the correct techniques to secure the rocks with mortar or concrete.
Proper installation by a professional ensures longevity and can prevent future issues such as shifting or erosion. It’s also important to consider local building codes, which professionals are usually familiar with.
Remember, whether you choose to install landscape rocks yourself or hire a professional, a thoughtful and well-executed installation will pay off in the long run in terms of aesthetic appeal and reduced maintenance.
Choosing the Right Supplier
When selecting a supplier for landscaping rocks, it’s vital to assess both online and local options. Online suppliers may offer a wider variety, but consider shipping costs which can affect affordability. Local suppliers might provide the advantage of viewing products in person.
A key factor in selection is the packaging of the rocks. Smaller quantities typically come in bags, making them easier to transport and handle. Large projects might require bulk delivery. Always check the size and weight specifications to ensure they meet your project needs.
Here’s a checklist when evaluating suppliers:
- Inventory: Look for a supplier with a range of sizes, colors, and rock types.
- Price: Compare pricing between suppliers. Remember, the most affordable option might not always provide the best value.
- Delivery: Determine if the supplier offers delivery and at what cost. Calculate this into your overall budget.
- Quality: Investigate the quality of the rocks. If possible, obtain samples before making a large purchase.
- Reviews: Read customer feedback for insights on reliability and customer service.
To summarize, choose your landscaping rock supplier based on their inventory, cost-effectiveness, delivery options, rock quality, and customer reviews. Your decision should balance cost with the convenience and quality appropriate for your landscaping needs.
Accessorizing with Landscaping Rocks
Landscaping rocks can transform your outdoor space when used thoughtfully. By mixing with other materials and employing them as accents, you can create a dynamic and appealing garden design.
Mixing with Other Materials
You’ll achieve the best aesthetic by mixing landscaping rocks with natural elements. Incorporate pebbles or lava rocks along the edge of a garden bed, with categories based on size and color:
- Pebbles (<2.5 inches)
- White marble chips: Brighten shaded areas
- River rocks: Smooth, rounded texture for a natural look
- Lava Rocks (2.5-5 inches)
- Red lava: Bold color for dramatic contrast
- Black lava: Adds depth and is excellent for heat retention
To blend with living elements, pair stones with grass or plant ground covers that creep over and between the rocks. Use stone mulch instead of organic mulch to reduce maintenance and add permanence to your landscape.
Using Rocks for Accents and Highlights
Strategically placed landscaping rocks create focal points and draw the eye across your garden. Here’s how you can use different types for accents:
- Accent Boulders
- Selection: Choose a rock that stands out yet complements your garden’s color scheme.
- Placement: Set it where it can be a commanding presence or anchor a bed corner.
- Decorative Gravel
- Pathways: For high-traffic areas, use crushed stone that compacts well.
- Plant Highlight: Circle specimens with contrasting pebbles to spotlight them.
Remember, less is often more. Use bold rocks sparingly to ensure each accent remains impactful.
Enhancing Property Features with Rocks
By incorporating rocks into your landscaping, you can significantly elevate the aesthetic appeal and functionality of your property.
Boosting Curb Appeal
To enhance your home’s curb appeal, strategically place rocks of various sizes and colors around your front yard. Utilize larger stones as focal points to draw the eye and smaller pebbles to create pathways or borders. For a polished look, ensure uniformity by:
- Choosing rocks with similar hues to complement your home’s color scheme.
- Arranging rocks in a natural, flowing design to mimic nature and avoid a contrived appearance.
Multifunctional Rock Features
Rocks can serve more than just a visual purpose; they can be multifunctional elements in your landscaping. Flat rocks can double as stepping stones or informal seating in garden areas. Additionally, rocks can provide natural edging for planting, garden, and flower beds, offering variation and a protective boundary. To create these multifunctional features:
- Select flat rocks for:
- Pathways
- Stepping stones
- Seating areas
- Use rocks to construct raised beds for:
- Improved drainage
- Distinct soil environments
- Elevated aesthetic appeal
Additional Rock Uses in Landscaping
Landscaping rocks can transform your outdoor spaces not just visually but also functionally. Here’s how you can use them beyond garden beds and borders.
For Entertainment and Leisure Areas
When creating patios, the use of flagstone or slate can provide a natural, durable surface. These flat stones are ideal for seating and dining areas, as they offer stability and can complement your outdoor decor. If fire pits are on your agenda, river rocks or lava stones are excellent choices. They withstand high temperatures and add a rustic charm to your cozy gathering spots.
Practical Applications
For driveways, decomposed granite provides a more permeable alternative to traditional concrete or asphalt, allowing for better rainwater absorption. With cobblestones, you achieve a timeless look, and these rounded stones are sturdy enough for frequent vehicle traffic. If you’re considering a children’s playground, pea gravel is a soft, safe option for areas beneath swings and slides. In terms of structure, rocks can be integral in creating dry creek beds that aid in drainage while also enhancing the appearance of your landscape.